
I’ll drink to that! — Me to Everything
It’s been awhile!!! Life has been a whirlwind and I haven’t had the opportunity to take on many projects but I am getting back to my happy place of turning things from drag to fab. To get back into the swing of thing I tried my hand at a bar cart. In my mind, bar carts is an adulting must. You can let your personality shine through in the way you stage your cart. They can be as fancy or as simple as you want them to be. Plus, you can move them around to any room when you are entertaining. Winning! Here’s how I made mine.
I have a rustic chic kinda feel in my dining area so I had to make sure my cart messed well with that. Simultaneously, I wanted a cart that would be used even if I decided to change the look/feel of my dining room. I have aspirations to redo my kitchen/dining as a DIY project but I have mustard up the courage so I keep that in mind.
Things You Need:
- Wood – Common Board 1″x12″x8′
- Drill bits
- Electric Drill or a bunch of arm muscle
- 3/4″ or 1″ wood screws
- (4) 1/2″x16″ black iron pipes
- (4) 1/2″x12″ black iron pipes
- (4) 1/2″x3″ black iron pipes
- (2) 1/2″x6″ black iron pipes
- (4) 1/2″ 90 degree elbow
- (20) 1/2″ Floor Flange
- (2) 2″ wheel canister
- (2) 2″ wheel canister with brake
- Sand Paper
- Stain
- Polyurethane
- Level
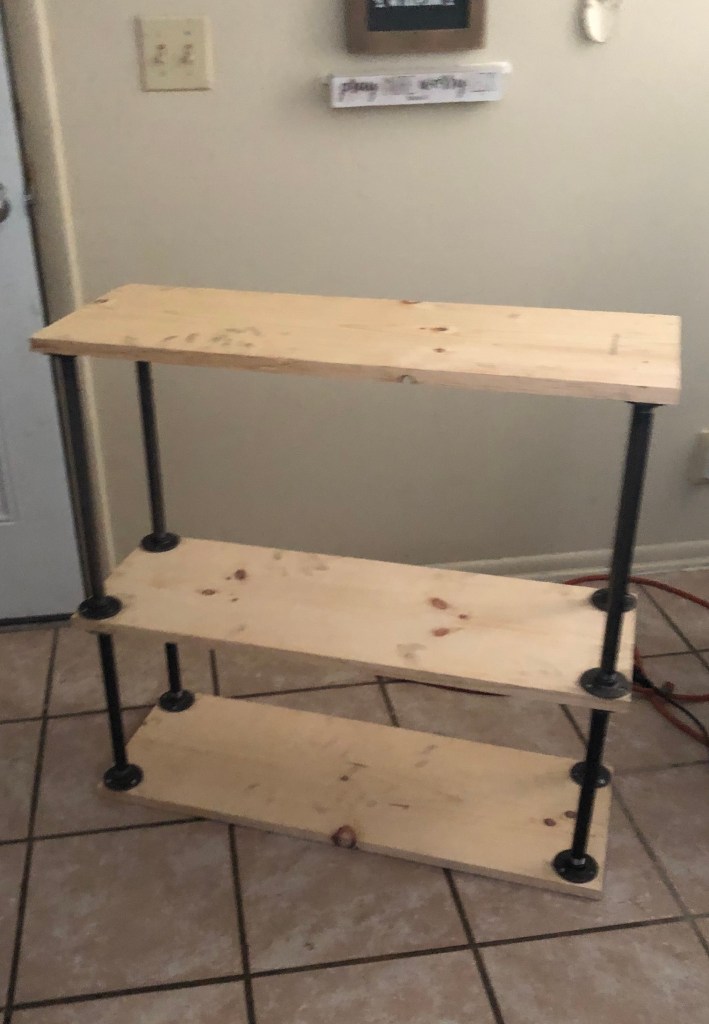
Step One: Measure & Cut Wood
I’m a little uncomfortable with certain power tools so I don’t even bother with them, YET. I will eventually out grow this but right now final destination is the movie that plays in my head around large power tools. Luckily, Lowe’s & Home Depot are my saving grace because they will cut wood purchased at their respective store to your desired length. I had the 8 foot board I purchased cut evenly in three piece. I don’t recommend adding to many shelves because you will go from bar cart to bar case.
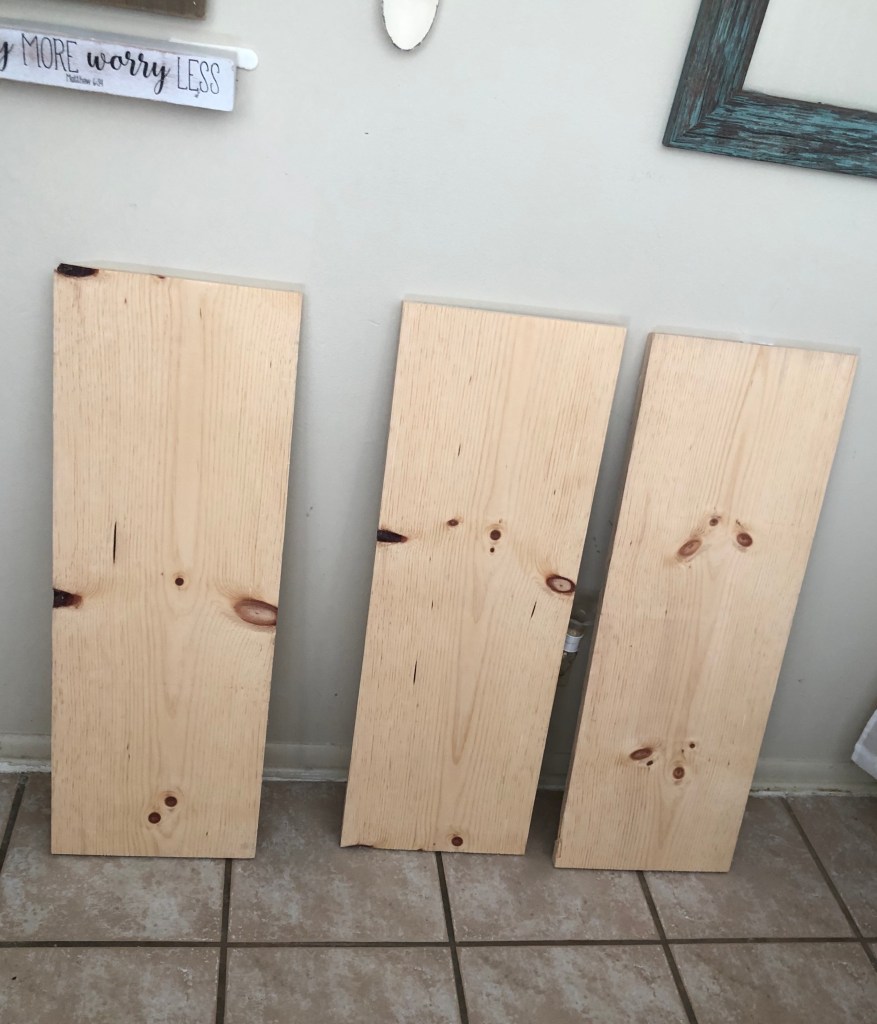
Your local Lowe’s & Home Depot can also cut glass and pipe to your measurement needs so check them out!
Step Two: Prep Your Wood
If you’ve ever purchase wood from a hardware store you know that wood can have bumps and bruises. Prep your wood by sanding any imperfections and the surfaces that you will stain. Please make sure when sanding wood you are in a well ventilated area and wear all protective gears! Step 3/4 can be done in reverse with Step 5 if you want even stain on the board. No one (except my sister) is going to look at the bottom of the shelf so I opted not to do it. I mean really why waste the time, sister.
Step Three: Drill in Flanges
Start on with the bottom shelf and position where you want your four flanges to sit. Remember this is the base and all the other pipes will follow suit. I chose to put it on the very edge so I didn’t have to bother with measuring of creating a template for drilling. Mark where you need your holes but don’t start drilling. Take a step back and visually look at your placement to make sure you like it. Once you have your placement correct make where you need the drill holes to be. After all are marked, I’d recommend drilling one flange to make sure they line up. Pre-drill your first set of holes and then screw your first flange into the base board. In complete transparency, I drilled three holes and got impatient! Remember, I am just getting back into the swing of things. I ditched the pre-drilling.
IMPORTANT: Keep in mind your screw placement. The other flanges will that to be adjusted (turned) to not hit in the same screw position.
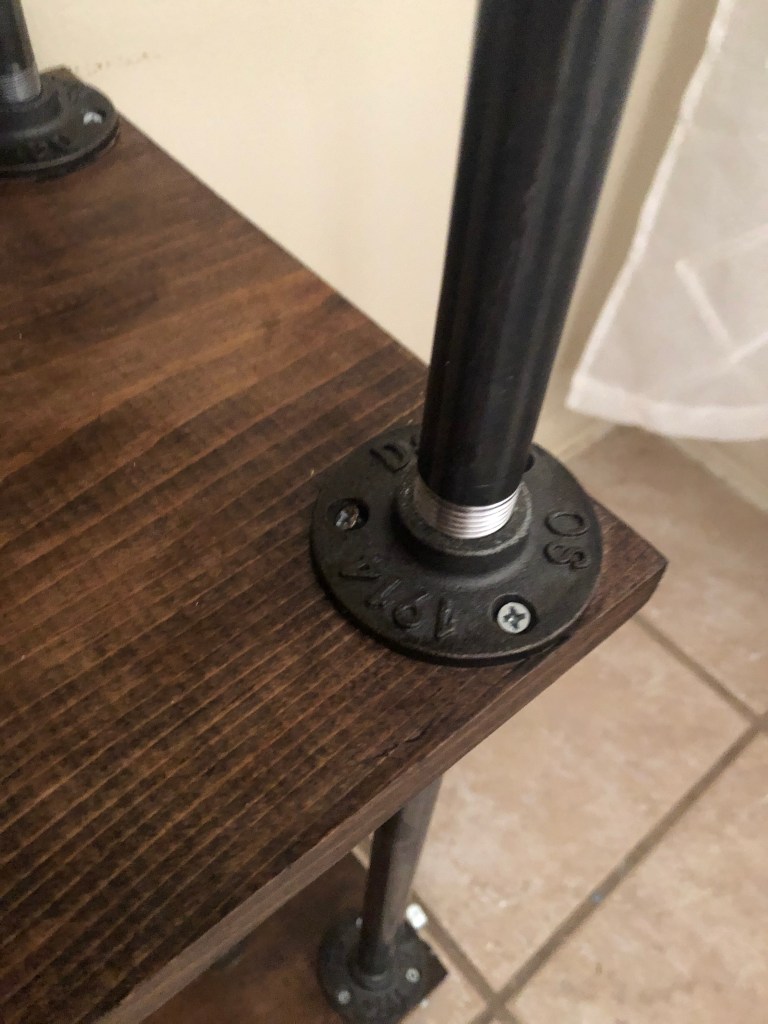
Step Four: Screw in the Pipes
Screw in the first set of pipes. Take a step back and make sure you are okay. It’s better to make changes in this step than to disassemble a full cart. Here is where it starts to get tricky. When you are tighten pipes to another connection you are to be mindful of the twist direction. I learned the hard way when you are tighten one side you are simultaneously loosen the other (mind-blown). The work around is after you put the first set of pipes on go ahead and twist on four more flanges. Turn your first layer upside down to your second layer line up where you need to screw in those flanges. Make sure the cart is not gansta leaning by using your level. Screw the flanges to the second shelf.
Repeat Step 3 and 4 again!
Step Five: Stain the Cart
I love when I get to stain wood instead of painting. The trick with stain is less is more. It is better apply several coats rather than an excessive amount all at once.
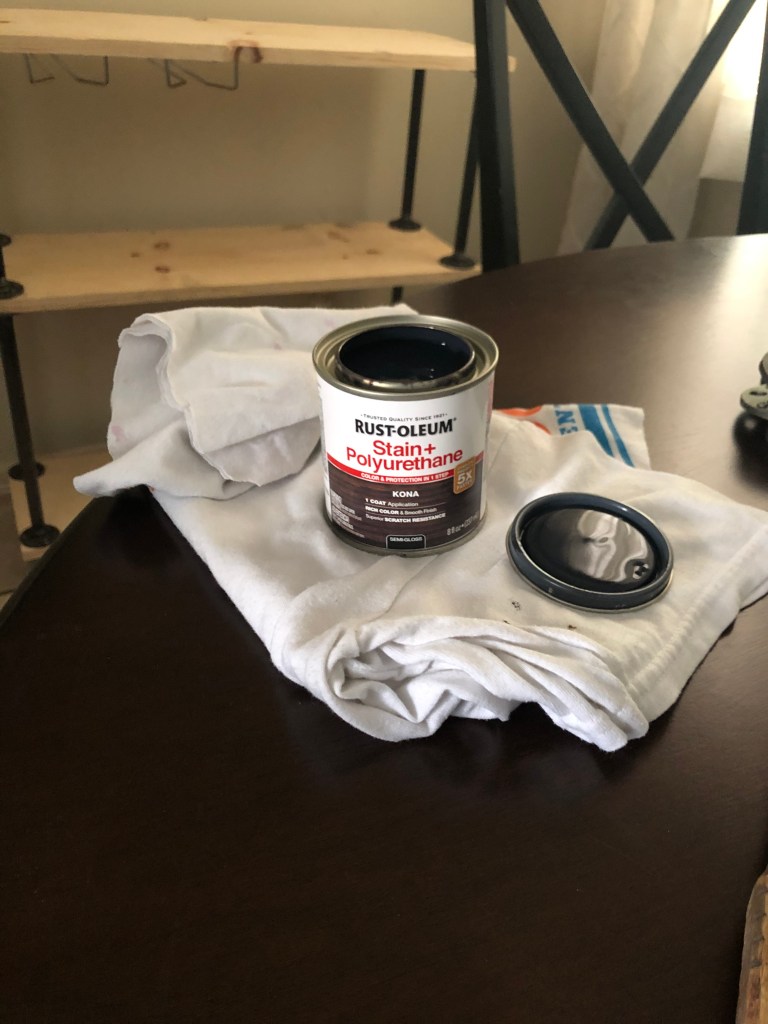
Prep your wood by making sure it is free of any debris or dust. Use a clean white shirt to apply the stain and wipe off any excess stain. Use protective gloves and protect any surface that you don’t want stain. I lived on the edge so I didn’t stain over a drop-cloth.
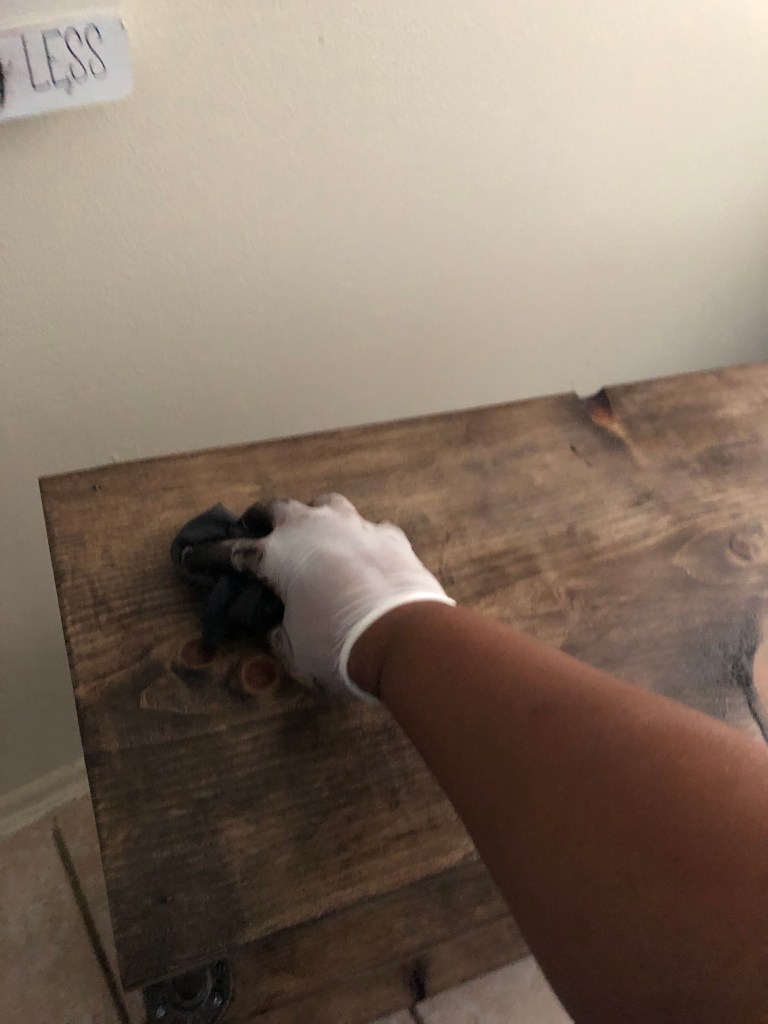
Don’t be afraid to mix stains to achieve your desired results! I did one based coat of KONA and two coats of Red Mahogany. My dining room table had dark brown/black undertones so I wanted to match it as best I could.
Apply a thin layer of Polyurethane after the stain had dried for 24 hours.
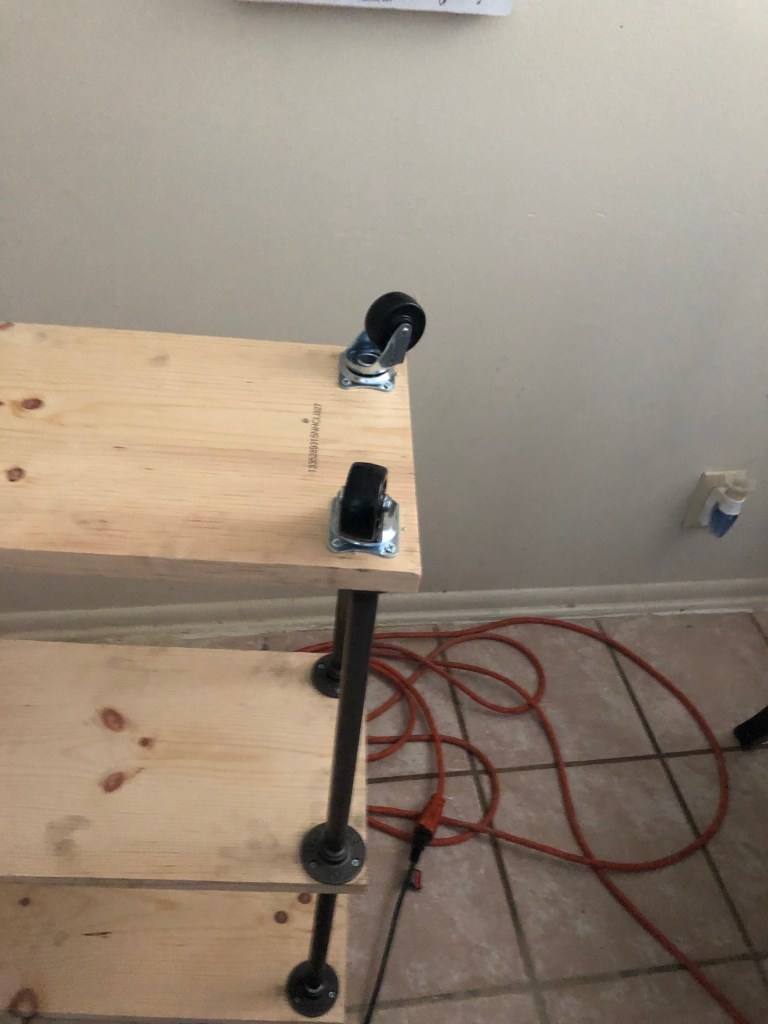
Step Six: Add Wheels
Turn the cart up side down and the wheel canister to the cart. Remember the canister with the brake will so on the opposite side of the canisters without the brake.
Step Seven: Add Cart Accessories
I ordered under cabinet wine racks to add to my cart. Flip the cart over and measure where you want the racks to hang. Mark holes for drill and screw rack to top board.
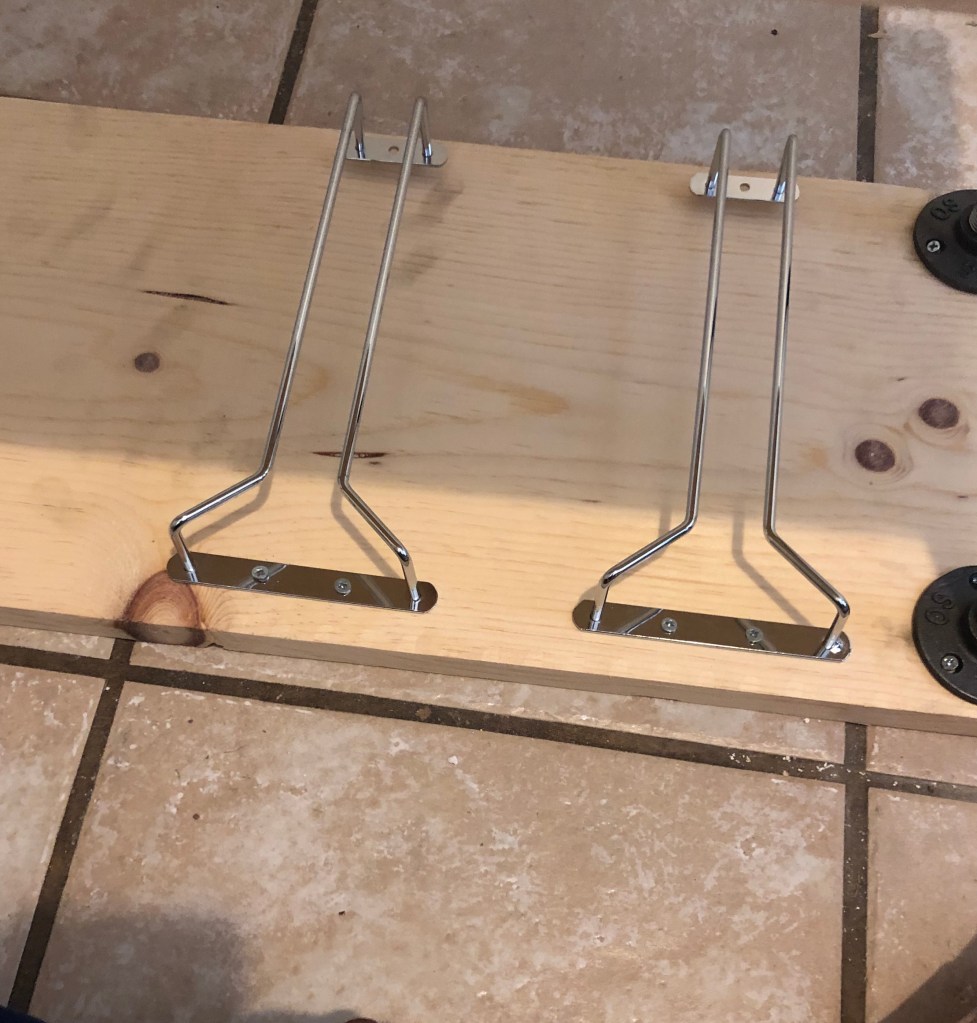
Flip cart back over to the upside. Assemble both handles. Screw in flanges to all four sides and place on cart but do not screw in yet. Align where each handle should sit and mark each hole. As in Step 3 tackle one flange at a time until all four are secured.
Step Eight: Stage & Enjoy!
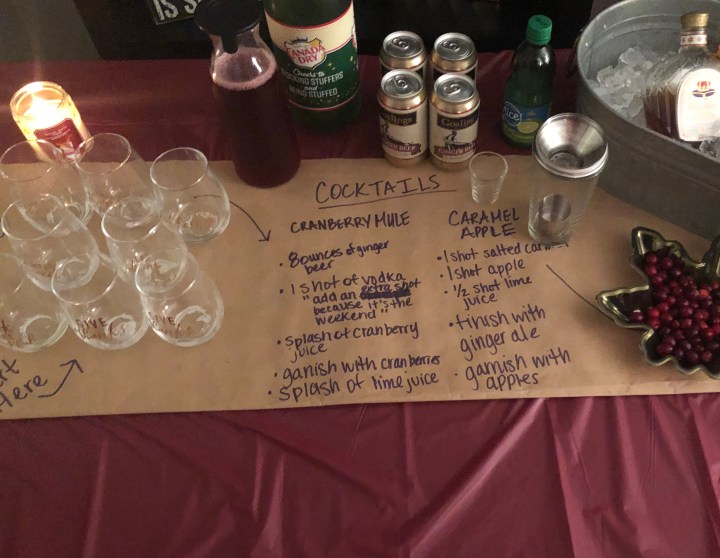
Now it’s time to add your personal touch to your cart. My go to adult beverage is a moscow mule so it was a must I incorporated it into the cart. Bar carts are really what you make them! You can change the staging with the seasons. Try a hot chocolate bar in the winter. Just have fun with it!!

Frugal Fan Tip: Try to display cocktail glasses in threes. Typically, glasses can be purchased in a set of four. So by displaying in threes you always have a back up in case one glass breaks.