
There is beauty in simplicity! — Unknown
I love decorating with paper products for many reasons! It is an affordable way to decorate any event and clean up is fairly easy. Your decorations can go from the wall to the recycling bin or can be reused for the future.
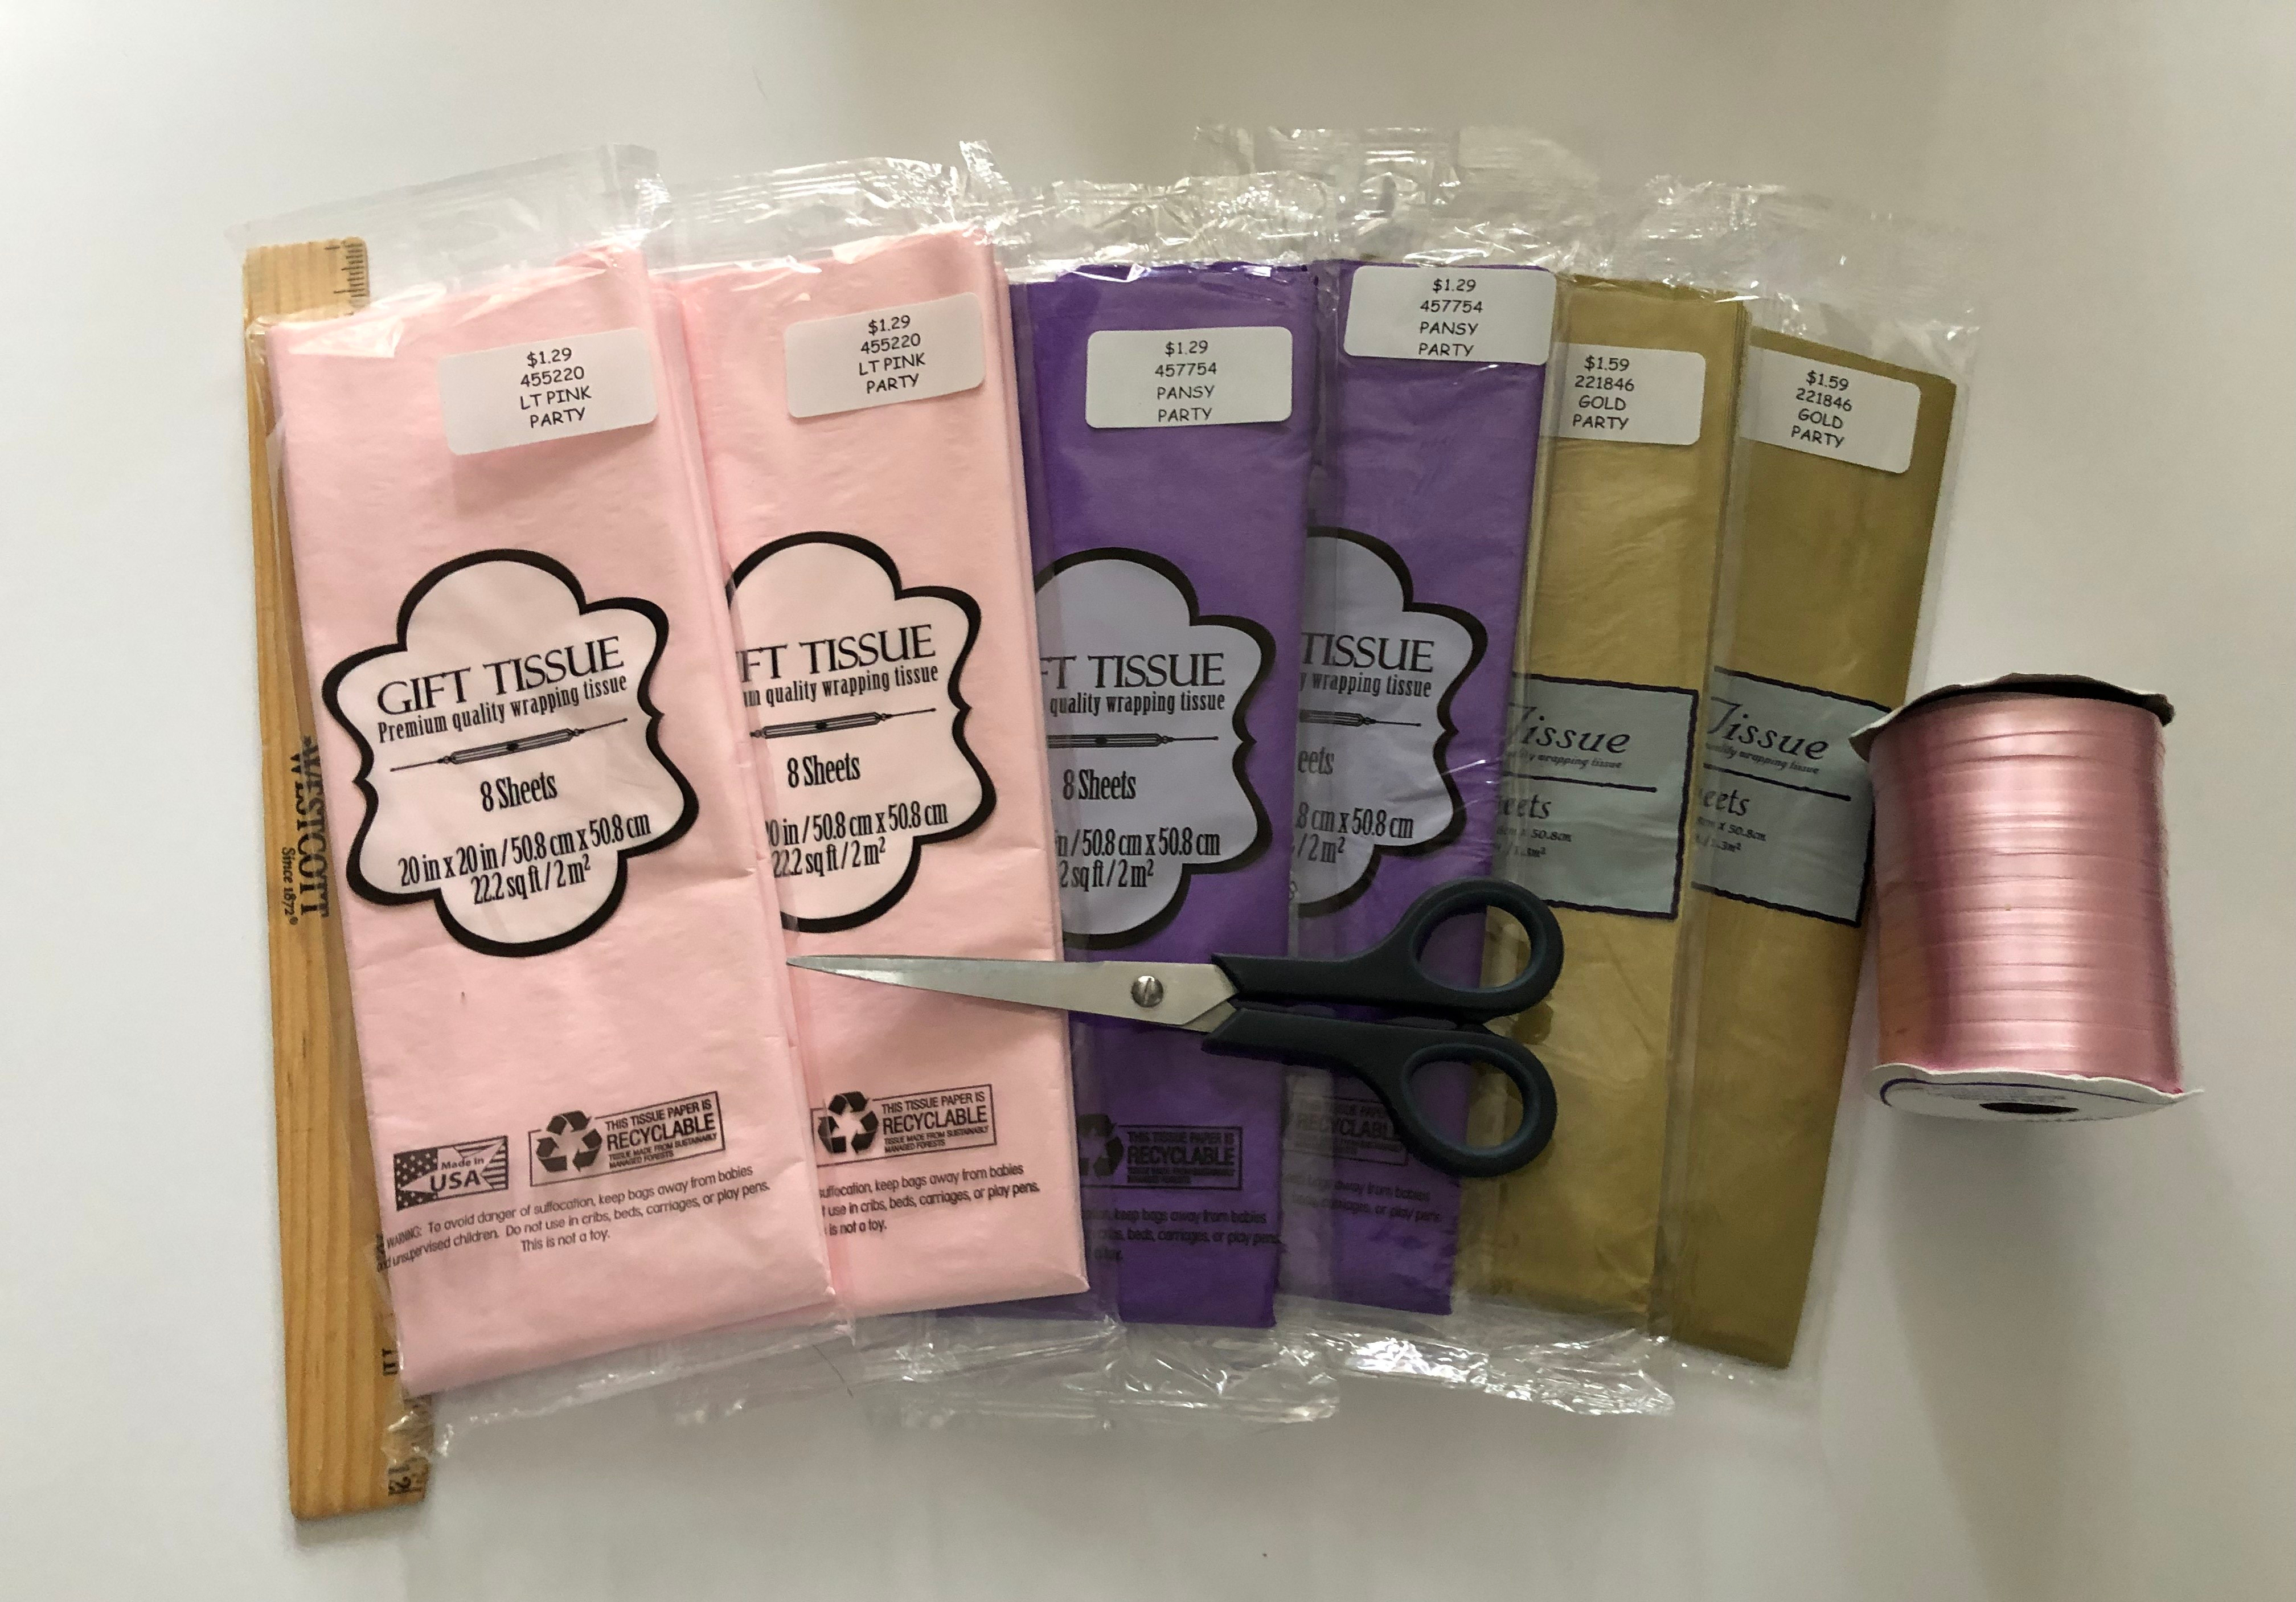
Things You Need:
- Ruler
- Scissors
- Ribbon
- Tissue Paper
- Stapler (optional)
Step One: Prep Work
Start with one package of tissue paper, diving the the 8 sheets into two stacks. Set one stack aside and flatten the remaining stack of 4 sheets.
Step Two: Fold Accordion Style
Fold the tissue paper accordion style. Each fold should be no more than 1 inch.

Step Three: Cut Desired Lengths
After the tissue paper is folded, use your ruler to measure approximately 6 inches and cut.
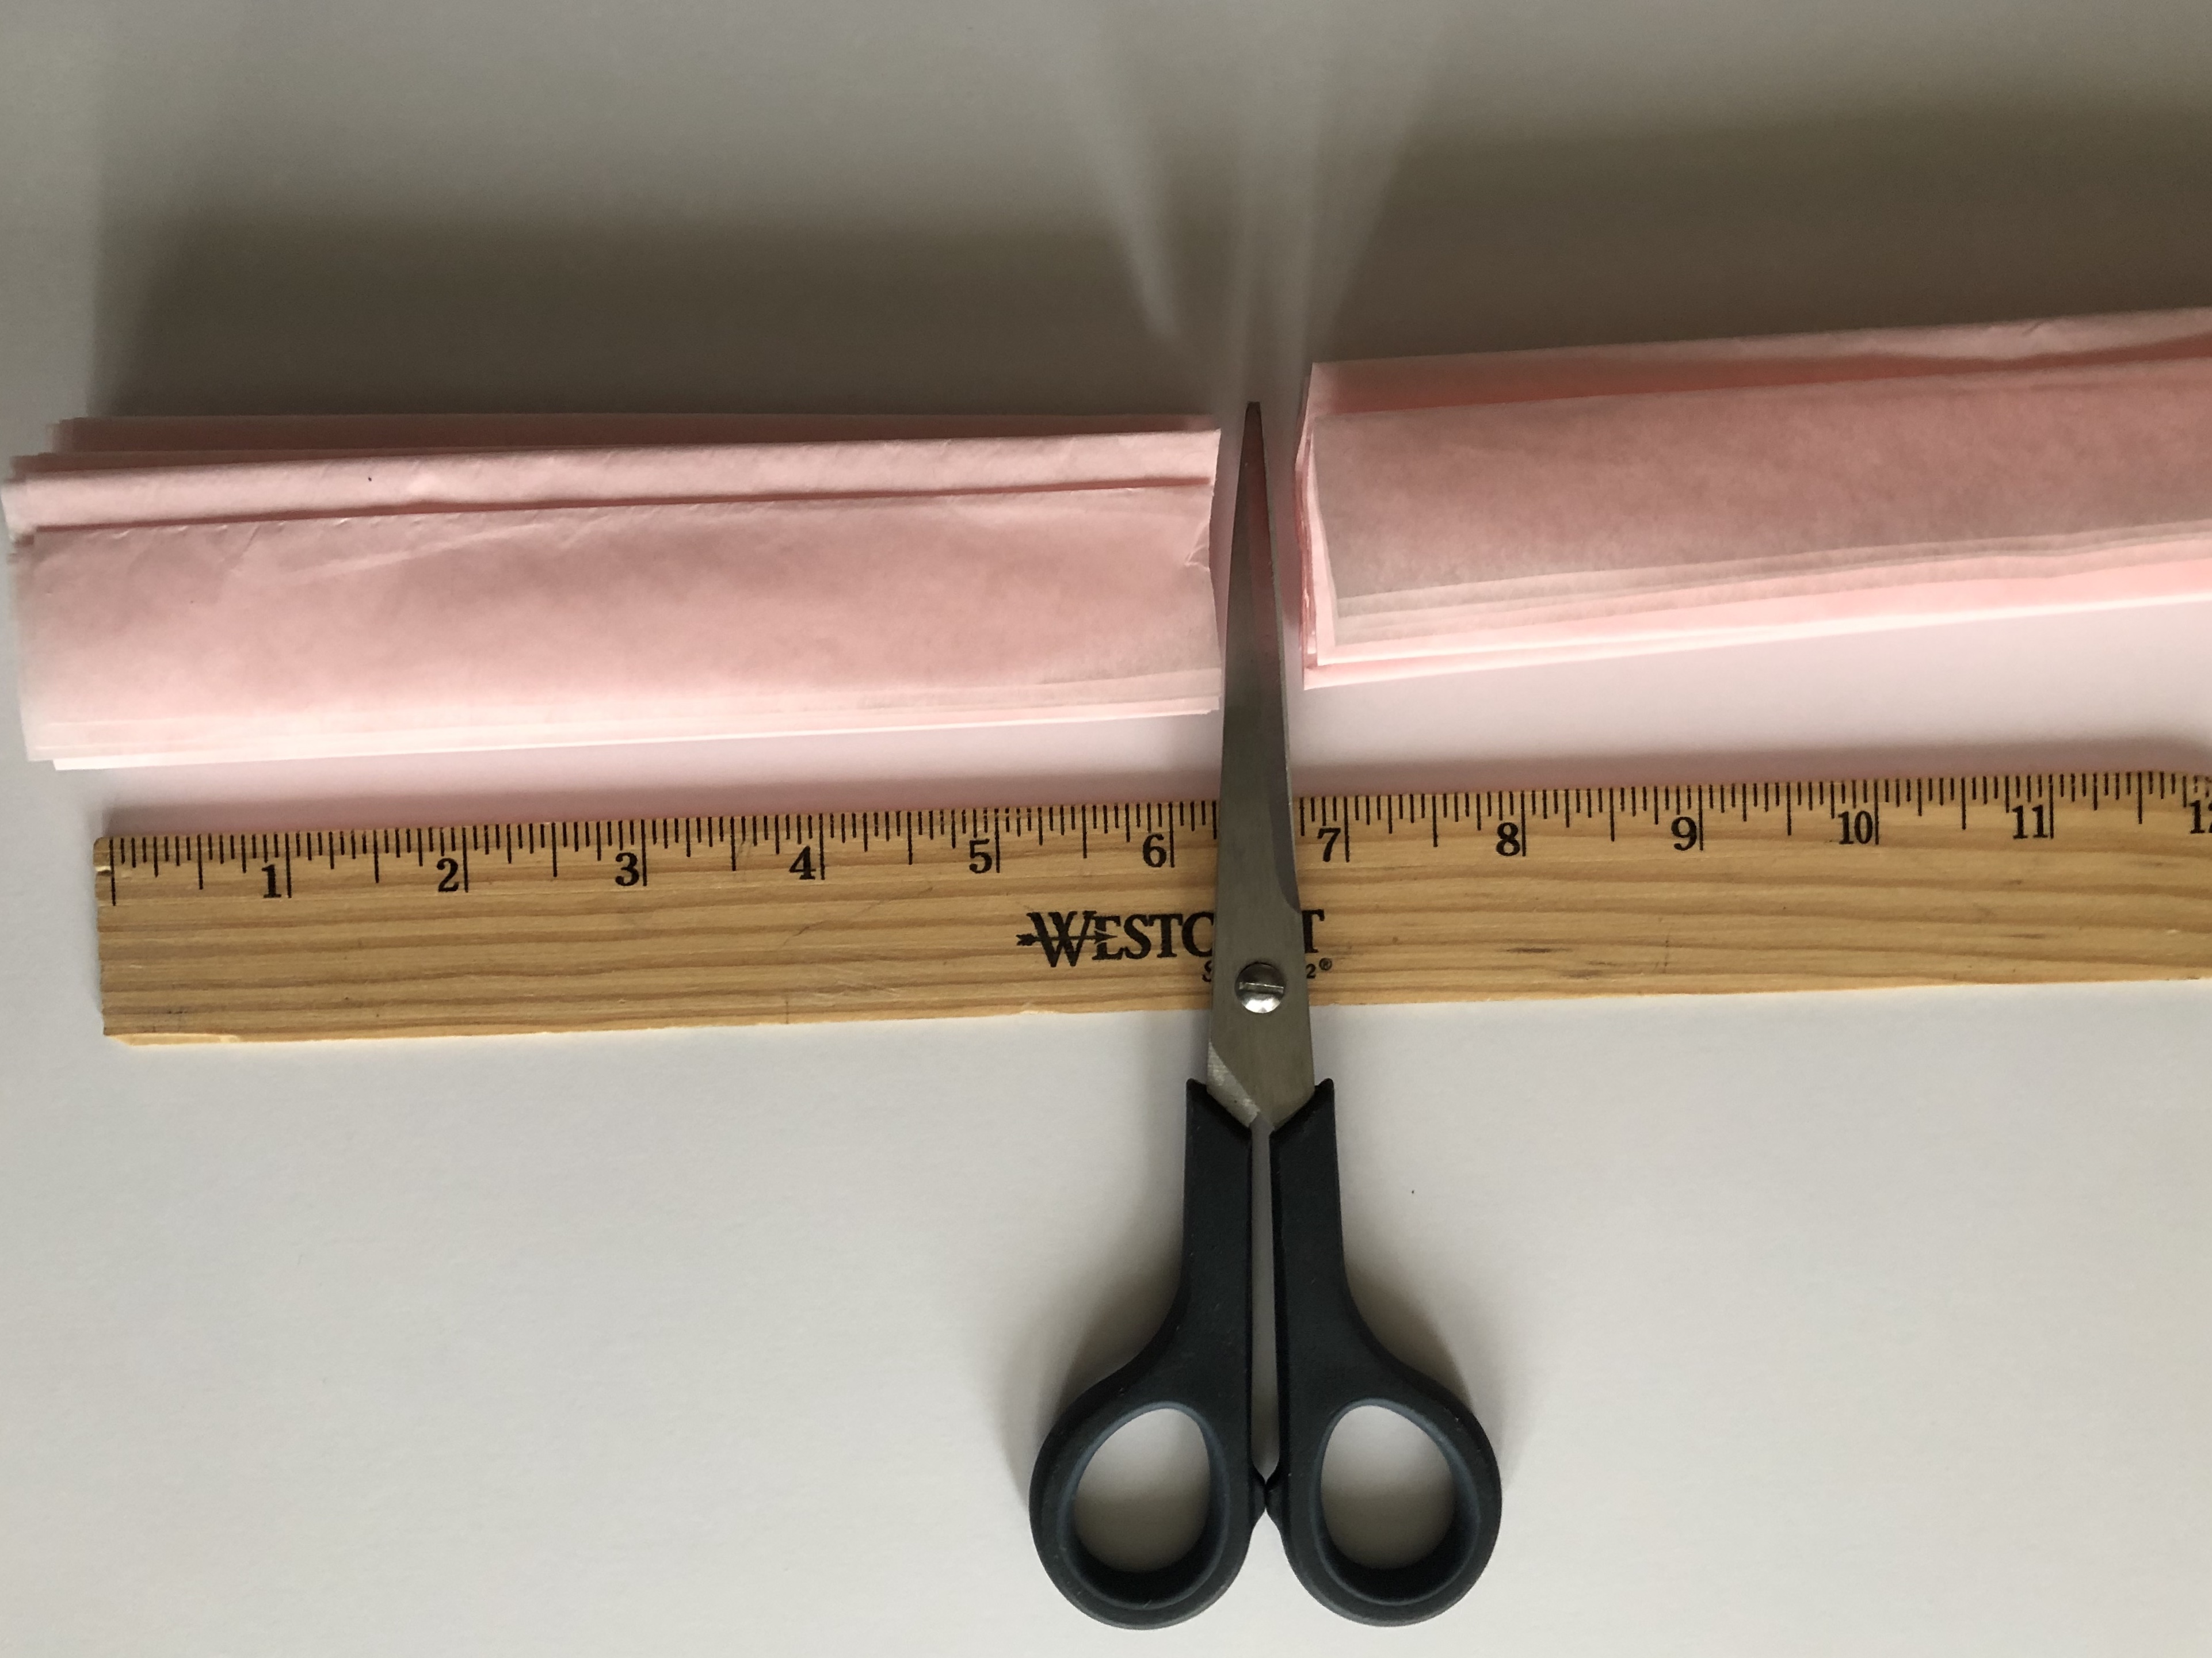
Cut the 6 inch piece of tissue paper in half. You should have the following from that stack of paper.
- 1 – 14 inches
- 2 – 3 inches
Step Four: Repeat
Repeat steps on the stack of tissue paper step aside. When you reach Step Three, measure 10 inches and cut.

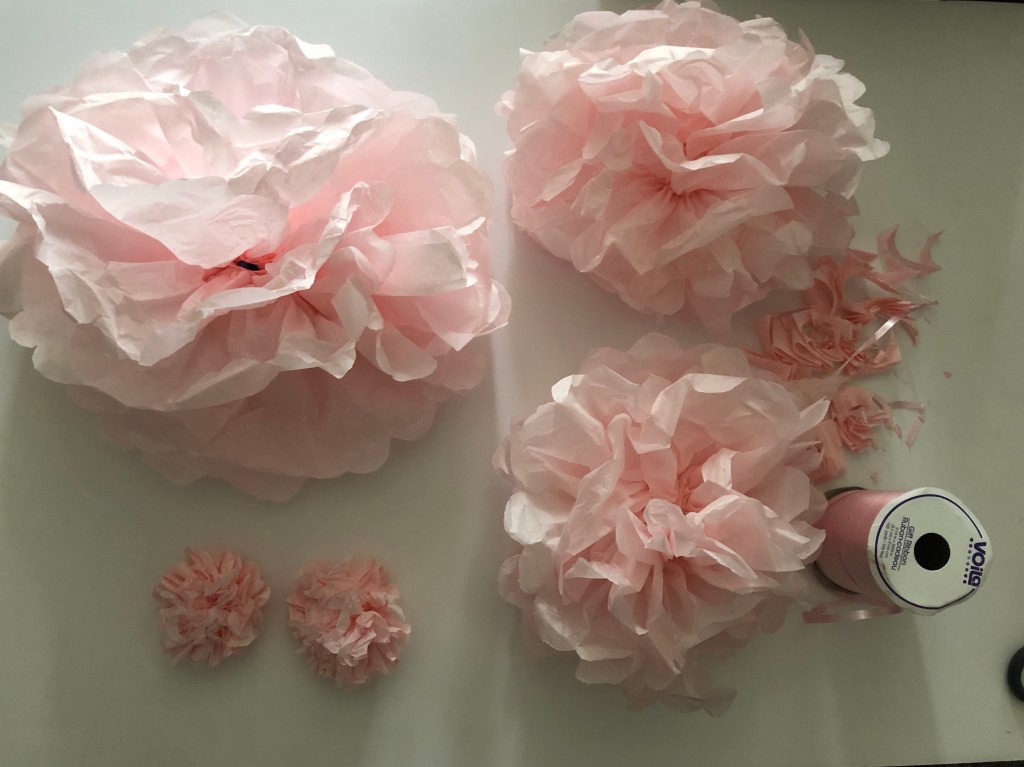
You should the following pieces from one package of 20 in. X 20 in. tissue paper:
- 1 – 14 inches
- 2 – 3 inches
- 2 – 10 inches
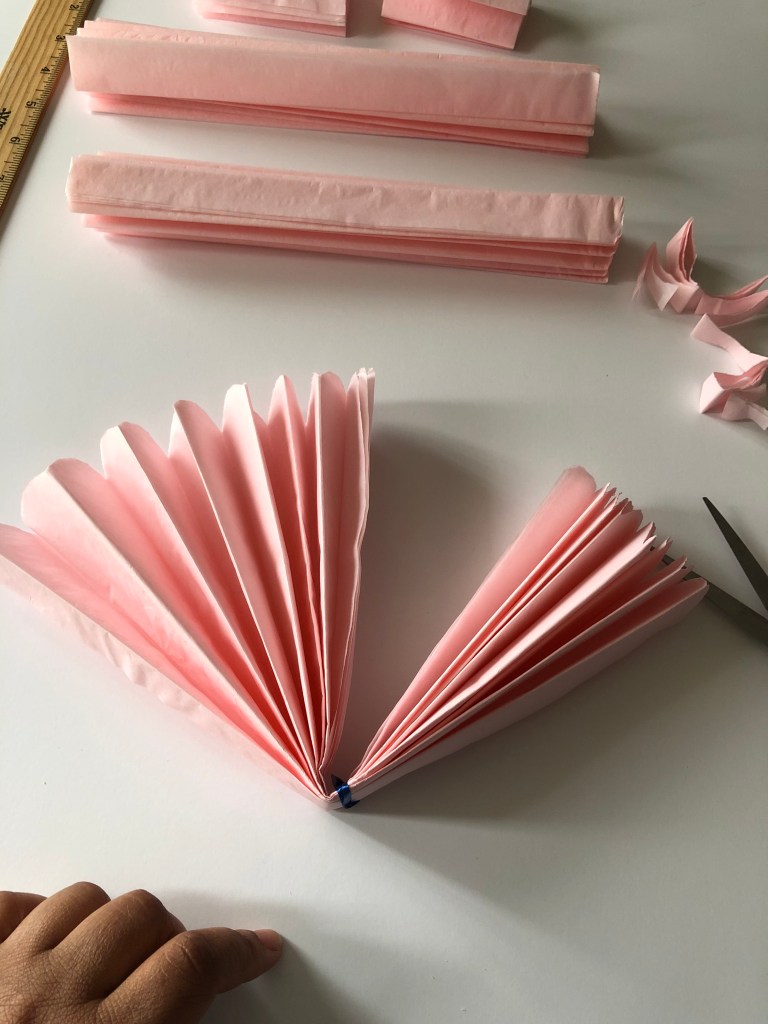
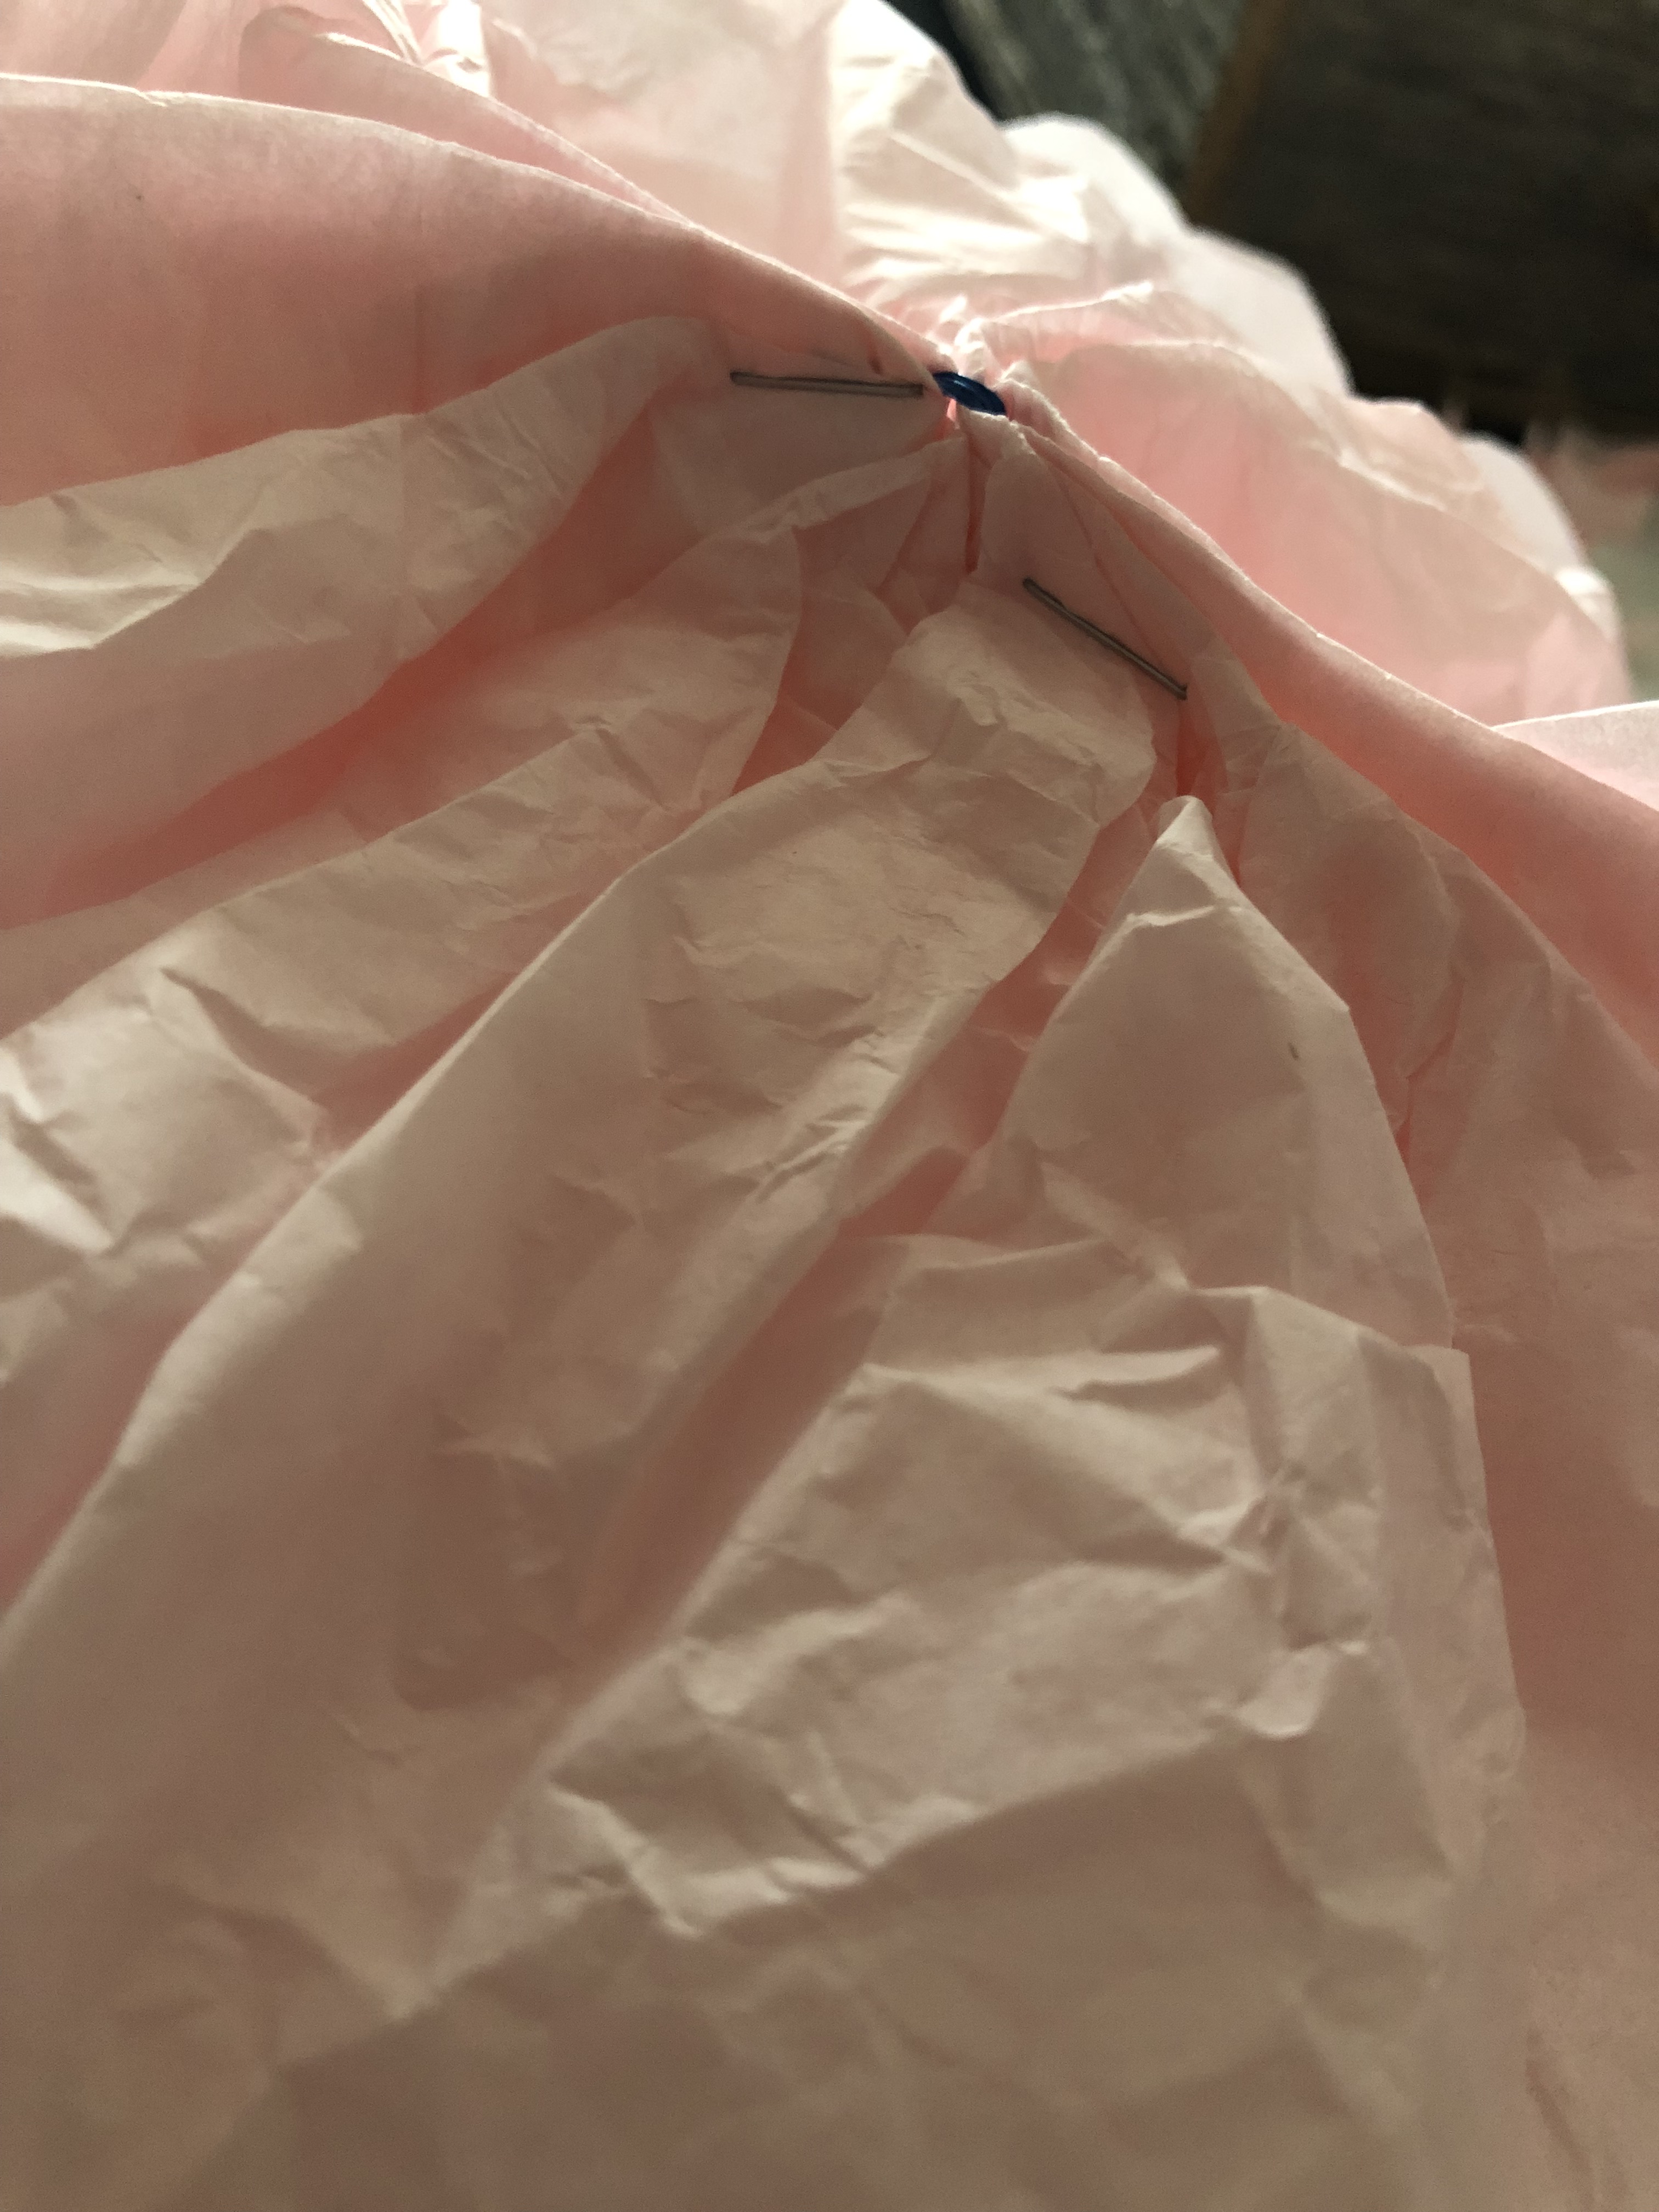
Step Five: Secure with Ribbon
Working with one piece at a time, fold in half and tie with ribbon. Ensure that the ribbon has a snug fit.
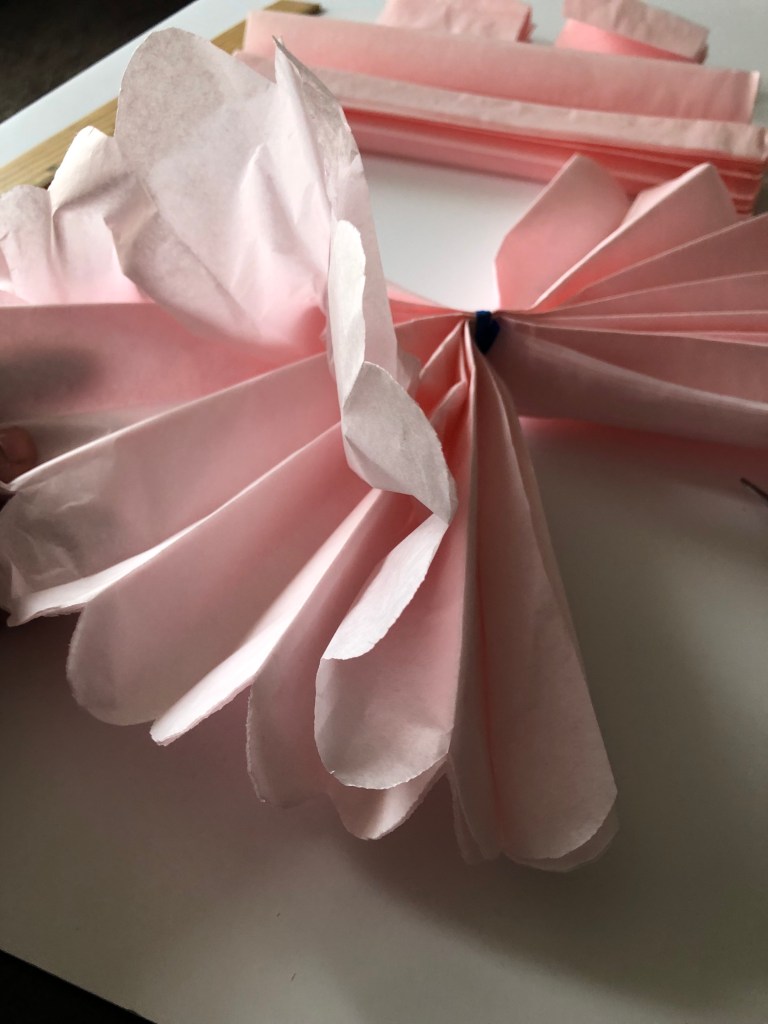
Step Six: Round The End
Using your scissors, round the ends on both sides.

Step Seven: Fluff The Pom-Poms
Gently pull one layer at a time toward the center. Alternate sides if your center ribbon begins to move. If you rip the tissue paper during the fluffing DO NOT panic. Just blend it in. Honestly, you won’t be able to tell.
*Optional: Add stables to the back of larger pom-poms if additional structure is needed for fullness.
Step Eight: All Done!
Repeat Steps 5-7, for the bother pieces and you have successfully make tissue paper pom-poms. Use tape to secure them on walls or tape two of the same size together to make a ball for hanging.
Now it’s time to decorate…

